
Introduction
There’s something undeniably impressive about a perfectly seared tuna steak—it’s tender on the inside, slightly caramelized on the outside, and bursting with flavor. But here’s the secret: it’s not as intimidating as it looks. In fact, with just a few simple steps, you can whip up this restaurant-worthy dish in under 15 minutes.
I first tried seared tuna at a sushi restaurant years ago, and I remember thinking, “This is something I could never recreate at home.” Fast forward to now, and it’s become one of my go-to recipes when I want something quick, healthy, and elegant. Whether you’re cooking for yourself after a long day or hosting a dinner party, this Fast & Easy Seared Tuna is sure to impress.
So grab your skillet, and let’s turn this luxurious ingredient into a dish that feels effortless yet extraordinary.
Why You’ll Love This Recipe
Before we dive in, here’s why this Seared Tuna recipe deserves a spot in your repertoire:
Quick & Simple: From prep to plate, this dish takes less than 15 minutes—perfect for busy weeknights or last-minute entertaining.
Healthy & Nutritious: Tuna is packed with lean protein, omega-3 fatty acids, and essential nutrients like vitamin D and selenium.
Versatile: Serve it as an appetizer, main course, or even over a salad for a light lunch.
Impressive Yet Approachable: The vibrant sear and delicate texture make this dish look fancy, but trust me—it’s easier than you think.
Ingredients You’ll Need
Here’s what you’ll need to create this flavorful masterpiece:
For the Tuna:
2 tuna steaks (Ahi or Yellowfin, about 6-8 oz each)
1 tablespoon sesame seeds (optional, for added crunch)
1 teaspoon kosher salt
½ teaspoon freshly ground black pepper
1 tablespoon neutral oil (like avocado or grapeseed oil, for high heat)
For the Sauce (Optional):
2 tablespoons soy sauce
1 tablespoon fresh lime juice
1 teaspoon honey or maple syrup
1 clove garlic, minced
1 teaspoon grated ginger
Step-by-Step Instructions
Let’s walk through the process together. Don’t worry—I’ll guide you every step of the way.
Step 1: Prep the Tuna
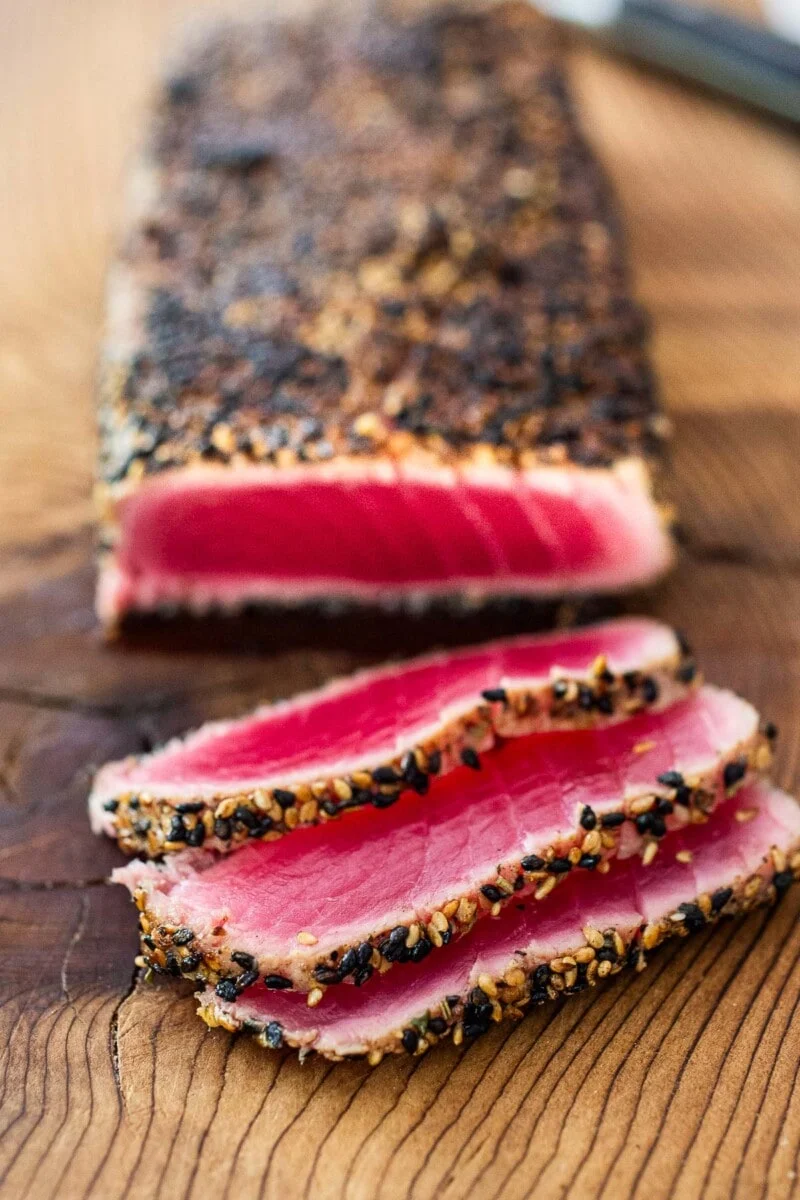
Start by patting the tuna steaks dry with paper towels. This is crucial because excess moisture can prevent a good sear. Once they’re dry, season both sides generously with salt and pepper. If you’re using sesame seeds, press them gently onto the surface of the tuna for a nutty crunch.
Pro Tip: If you’re new to cooking tuna, aim for steaks that are about 1-inch thick. They’re easier to handle and give you that perfect balance of rare center and crispy exterior.
Step 2: Heat the Pan
Heat a heavy-bottomed skillet (stainless steel or cast iron works best) over medium-high heat. Add the oil and let it get nice and hot—you’ll know it’s ready when the oil shimmers or moves quickly across the pan.
Pro Tip: Don’t skip the preheating step! A hot pan is key to achieving that beautiful golden crust without overcooking the fish.
Step 3: Sear the Tuna
Carefully place the tuna steaks in the skillet. Let them cook undisturbed for about 1-2 minutes per side, depending on how rare you like your tuna. For a classic sear, aim for a golden-brown crust on the outside and a cool, rosy center. If you prefer your tuna more cooked through, extend the cooking time slightly—but don’t overdo it, or it can dry out.
Pro Tip: Use tongs to hold the edges of the tuna against the pan for a few seconds if you want all sides to have a bit of color. It’s a small detail, but it makes a big difference!
Step 4: Rest and Slice
Once the tuna is seared to your liking, transfer it to a cutting board and let it rest for a minute or two. Then, slice it thinly against the grain for serving. This ensures each bite is as tender as possible.
Make the Sauce (Optional)
While the tuna rests, whisk together the ingredients for the sauce: soy sauce, lime juice, honey (or maple syrup), minced garlic, and grated ginger. This quick sauce adds a tangy, umami-rich element that pairs beautifully with the mild flavor of the tuna.
Pro Tip: Taste the sauce before serving—if it needs a little more sweetness or acidity, adjust accordingly. Cooking is all about making it your own!
Tips from the Chef
Here are a few insider secrets to ensure your seared tuna turns out perfectly every time:
Buy High-Quality Tuna: Look for sushi-grade tuna steaks at your local fish market or grocery store. Freshness matters!
Don’t Overcook: Tuna is best when it’s still pink in the middle. Think of it like a rare steak—juicy and tender.
Experiment with Seasonings: Swap the sesame seeds for crushed peppercorns or a sprinkle of chili flakes for a different twist.
Serve Immediately: Tuna is best enjoyed right after searing while it’s still warm and juicy.
Nutritional Benefits
Tuna is a nutritional powerhouse, making this dish as healthy as it is delicious:
Lean Protein: Supports muscle repair and keeps you feeling full longer.
Omega-3 Fatty Acids: Promotes heart health and reduces inflammation.
Low in Calories: Perfect for those looking to enjoy a light yet satisfying meal.
Pair it with a side of greens or a simple salad, and you’ve got a balanced, nutrient-packed dinner.
Serving Suggestions
This Seared Tuna is incredibly versatile. Here are some ideas for serving it:
Over Salad: Slice the tuna and serve it over a bed of mixed greens with avocado, cucumber, and a drizzle of the soy-lime sauce.
With Rice: Pair it with jasmine rice or quinoa for a heartier meal.
As an Appetizer: Cut the tuna into bite-sized pieces and serve it with toothpicks for an elegant starter.
With Veggies: Roasted asparagus, sautéed spinach, or steamed broccoli make excellent sides.
Customization Ideas
One of the best things about this recipe is how easy it is to adapt. Here are some ways to make it your own:
Add Heat: Sprinkle red pepper flakes or drizzle sriracha over the finished dish for a spicy kick.
Try Different Sauces: Swap the soy-lime sauce for a wasabi mayo, ponzu, or even a citrusy vinaigrette.
Switch Up the Seeds: Use black sesame seeds or crushed nuts instead of white sesame seeds for a unique twist.
Final Thoughts
This Fast & Easy Seared Tuna is proof that great food doesn’t have to be complicated. With just a few ingredients and minimal effort, you can create a dish that feels indulgent yet wholesome. Whether you’re cooking for one or hosting a dinner party, this recipe is sure to leave a lasting impression.
I hope you give this dish a try—it’s one of those recipes that reminds us how simple, fresh ingredients can transform a meal into something truly special. And if you do make it, I’d love to hear how it turned out! Share your thoughts, tweaks, or creative pairings—I’m always here to chat about food.
Until next time, happy cooking—and may your meals always be flavorful! 🍣✨